- Mengerti Format Label di Excel
- Pentingnya Memberi Label pada Data di Tom and Jerry 121
- Step-by-Step Guide to Inserting Labels in Excel
- 1. Create a New Document
- 2. Open the Label Creation Wizard
- 3. Select the Label Type, Size, and Data Source
- 4. Insert the Data into the Labels
- Best Practices in Labeling Data for Efficient Analysis
- Utilizing Label Filters to Easily Sort and Analyze Data in Tom and Jerry 121
Mengerti Format Label di Excel
Excel adalah salah satu dari program komputer yang paling banyak digunakan di seluruh dunia. Software ini digunakan untuk berbagai macam kebutuhan, mulai dari administrasi, akuntansi, sampai pada penelitian dan analisis. Salah satu hal penting yang harus kamu tahu ketika menggunakan program Excel adalah mengenai format label. Mengerti format label di Excel sangatlah penting, karena dengan demikian anda bisa memaksimalkan penggunaan Excel.
Ketika kamu membuka program ini, tidak ada yang perlu Kamu lakukan selain memilih jenis chart atau diagram yang sesuai dengan kebutuhanmu, dan memasukkan data. Hal ini akan sangat membantu terutama saat kamu ingin memvisualisasikan data berupa angka yang besar dan rumit menjadi bentuk visual yang lebih menarik dan mudah dipahami.
Namun, dalam penggunaan Excel, terkadang kamu mungkin perlu menyesuaikan tampilan grafik tersebut memakai format label yang sesuai. Hal ini akan membuat grafik jadi terlihat lebih rapi dan mudah dipahami oleh orang yang melihatnya.
Format label di Excel terdiri dari beberapa komponen utama seperti jenis, ukuran, jenis huruf, warna, dan efek. Ketika kamu memilih satu komponen, biasanya akan ada opsi lain yang muncul di layar Excel.
Jenis label pada Excel sendiri ada beberapa, label kategori, data series label, dan label data point. Setiap jenis label memiliki fungsi dan penggunaannya masing-masing. Tiap jenis label dapat menentukan posisi dan orientasi label pada grafik. Oleh karena itu, kamu harus memahami betul fungsi dari masing-masing jenis label agar tampilan grafiknya terlihat lebih terstruktur dan rapi.
Bagi orang yang baru saja belajar atau menggunakan Excel, terkadang format label sepele dan disepelekan. Padahal, hal ini sangatlah penting karena bagaimana data tersebut bisa dimengerti dan dipahami oleh orang lain. Jangan ragu untuk mempelajari lebih dalam mengenai format label pada Excel.
Di sisi lain, jika kamu merasa kesulitan dalam memahami format label di Excel, kamu dapat mencari tutorial atau panduan di internet untuk memperdalam pemahaman kamu. Sebagai contoh, jika ingin mengetahui cara format label tom and jerry 121 di Excel, kamu bisa mencari panduan di Google dan Youtube dengan mudah.
Dalam memahami format label pada Excel, kesabaran dan ketelitian adalah hal yang penting. Karena pada dasarnya, Excel adalah tool yang sangat berguna jika kamu bisa memahami cara menggunakannya dengan baik. Semoga artikel ini bisa membantu kamu memahami format label pada Excel, dan semoga sukses dalam menggunakannya.
Pentingnya Memberi Label pada Data di Tom and Jerry 121

Tom and Jerry 121 atau lebih dikenal dengan sebutan Microsoft Excel adalah sebuah program aplikasi pengolah data yang sangat popular di Indonesia. Banyak perusahaan, instansi pemerintah, dan individu menggunakannya dalam aktivitas sehari-hari, seperti pengolahan keuangan, penghitungan data, pembuatan grafik, dan sebagainya. Namun, seringkali pengguna terlalu fokus pada penginputan data dan mengabaikan pentingnya memberi label pada data yang telah dimasukkan. Padahal, memberi label pada data memiliki fungsi penting dalam pengolahan data.
Apa itu Label Data?
Label data pada Tom and Jerry 121 adalah sebuah metode untuk memberi tanda pengenal pada setiap data yang telah dimasukkan ke dalam program. Label biasanya diberikan pada baris atau kolom tertentu, dan berisikan informasi yang jelas dan mudah dimengerti tentang data tersebut. Contohnya, pada data penghasilan karyawan, label dapat diberikan pada kolom dengan nama ‘Nama Karyawan’, ‘Jabatan’, ‘Gaji Pokok’, ‘Tunjangan’, dan sebagainya.
Manfaat Label Data di Tom and Jerry 121
Memberi label pada data yang telah dimasukkan ke dalam Tom and Jerry 121 memiliki manfaat yang tidak dapat diremehkan, antara lain:
- Mempermudah pengolahan data: Dengan memberi label pada data, akan lebih mudah untuk memfilter, mengurutkan, atau mencari data tertentu dengan metode ‘Find & Replace’.
- Meminimalisir kesalahan pengolahan data: Label yang jelas dan sesuai dengan isinya akan membuat pengguna lebih mudah untuk memahami data yang sedang diolah, sehingga kesalahan input data dapat diminimalisir.
- Meningkatkan efisiensi waktu: Dengan penggunaan label yang teratur, pengguna dapat menghemat waktu dalam pengolahan data yang kompleks.
- Memperindah tampilan data: Label yang indah dan rapi akan membuat tampilan data lebih menarik dan profesional.
- Memudahkan berbagi data dan bekerja sama: Label yang konsisten akan memudahkan pengguna lain untuk memahami data yang diolah, sehingga dapat memudahkan kerja sama dalam satu tim.
Oleh karena itu, jangan pernah meremehkan pentingnya memberi label pada setiap data yang dimasukkan ke dalam Tom and Jerry 121.
Cara Memberikan Label Data di Tom and Jerry 121
Memberikan label data di Tom and Jerry 121 sangatlah mudah. Berikut adalah beberapa tahapan yang dapat diikuti:
- Pilih baris atau kolom yang ingin diberi label. Caranya dengan menekan angka pada kolom atau angka pada baris.
- Ketikkan label yang diinginkan pada kotak formula, yang terletak pada bagian atas worksheet.
- Jika berhasil, label akan muncul pada kotak formula dan sel akan berubah menjadi warna biru atau hijau.
- Untuk mengedit label, cukup klik dua kali pada kotak formula dan ubah label yang diinginkan.
- Untuk menghapus label, cukup tekan tombol ‘Delete’ pada keyboard.
Kesimpulan
Memberi label pada data merupakan sebuah hal yang penting dalam pengolahan data di Tom and Jerry 121. Label yang jelas dan sesuai dengan isinya akan mempermudah pengolahan data, meminimalisir kesalahan pengolahan data, meningkatkan efisiensi waktu, memperindah tampilan data, dan memudahkan berbagi data dan bekerja sama dengan orang lain. Oleh karena itu, jangan pernah meremehkan pentingnya memberi label pada setiap data yang dimasukkan.
Step-by-Step Guide to Inserting Labels in Excel
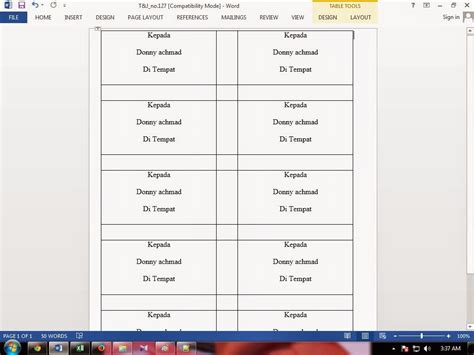
Excel’s label creation wizard can be used to create labels and tabular reports easily. With this tool, you can quickly insert cell contents into each label area to create hundreds of labels or reports with labels using the keyboard.
Here’s how to create labels:
1. Create a New Document
Go to Microsoft Excel and create a new document. You can press Ctrl+N on your keyboard to create a new file.
2. Open the Label Creation Wizard
Next, navigate to the “Mailings” tab at the top of your screen and click on “Labels”. The Label Creation Wizard will appear on your screen.
3. Select the Label Type, Size, and Data Source

Select the type of label you want to create and the size of the label using the ‘Label vendors’ dropdown. Then, select the label code from the ‘Product numbers’ menu. The selected label size will appear in the ‘Label information’ box at the top of the window.
After selecting the label type and size, choose your data source. You can select an excel sheet or a different source. Ensure that you click ‘New Document’ to create a new blank document for your label job. Then click ‘OK’.
4. Insert the Data into the Labels
The labels will appear on the right of the screen once you have inserted the data source. Each label can be filled with different fields.
To add a new field, click on ‘Insert Merge Field’ in the tool bar. A list of available fields will appear; click on the one you want to appear in the label, and use ‘Enter’ to move to the next label.
You can also add static text to the labels by typing it in manually. Once done, go to ‘Finish & Merge’, choose ‘Print’ or ‘Edit Individual Labels,’ and press ‘OK.’
In conclusion, using Excel to create labels for mailings or product labeling is a straightforward process. Follow these steps to access the Label Creation Wizard and start inserting the data that you need. Your labels will be created quickly and correctly using this tool. With Excel’s help, you can enhance your productivity and make your labels look neat and organized when you use them.
Best Practices in Labeling Data for Efficient Analysis
The use of labels is an essential aspect of data analysis in Indonesia. The proper labeling of data enables easy identification and understanding of the data. Data labeling involves the use of identifying names or numbers on a dataset for easier interpretation. To achieve an efficient analysis of data, it is necessary to observe proper labeling techniques. In this section, we will discuss some of the best practices for labeling data to ensure efficient analysis.
1. Be consistent with your labeling style
Consistency in labeling style ensures that information is presented uniformly. Always keep your labeling style consistent to guarantee that similar information are tagged with the same labels and are arranged similarly. This approach makes it easier to retrieve information and draw meaningful insights without wasting time analyzing different labeling styles. For example, if you are using abbreviations of terms, ensure that all abbreviations are consistent and make sense.
2. Use clear and concise labels
Clear and concise labels bring forth clarity to what a dataset represents. Therefore, ensure that the labels used are accurate, descriptive, and concise. Avoid using complicated names or terms that may confuse the user. Instead, use easily understandable terms that make sense to a person who is not familiar with the dataset.
3. Avoid using irrelevant labels
Be careful when labeling your dataset and avoid labeling with irrelevant or misleading tags. Using irrelevant labels may cause confusion and hinder meaningful analysis. Ensure that the labels you use represent the data precisely and concisely. It’s always helpful to come up with a list of labels before commencing the labeling process.
4. Use color coding to categorize labels
Color coding is an effective approach when grouping similar data aspects together. It provides quick identification and promotes clarity to the analysis. Using color-coding when labeling data enhances the analysis of values, creating an easy-to-use reference that makes the process more efficient. However, limit the use of colors to specific categories and ensure that all similar attributes are labeled with the same color code.
5. Maintain a labeling legend
It is easy to forget what a label stands for when analyzing complex datasets. Therefore, maintaining a labeling legend makes it quicker to recall the meaning of a label. The labeling legend acts as a reference sheet, allowing for the easy access to information when labels are wrongly placed. The legend should contain all the label names and their meanings to promote efficiency in the analysis process.
6. Regularly review and update your labels
Data is continually changing, and so are the labeling requirements. Therefore, it is essential to regularly review and update your labels. Reviewing your labels ensures that they remain relevant and reflect the current data sets. Discrepancies in the labeling process may hinder the identification of critical trends and patterns- making data analysis ineffective. Updating labels promotes easy retrieval of information, making the analysis process seamless over time.
In conclusion, efficient labeling of data is a critical aspect that enhances the analysis process. Proper labeling techniques enhance clarity, consistency, and accuracy of datasets. Always strive to adhere to the best labeling practices, including using clear, concise labels; maintaining a legend; being consistent in style; and periodically reviewing your labels to ensure their relevance.
Utilizing Label Filters to Easily Sort and Analyze Data in Tom and Jerry 121
Tom and Jerry 121 is a popular format label used by Indonesians to organize and analyze data in Microsoft Excel. One of the most powerful features of Excel is its ability to filter data based on specific criteria. With label filters, users can easily sort and analyze data within Tom and Jerry 121 to gain insights and make informed decisions.
1. How to Apply a Label Filter in Tom and Jerry 121
To apply a label filter in Tom and Jerry 121, start by selecting the column you want to filter. Then go to the Data tab and click on the Filter button. This will add drop-down menus to each column heading. Click on the drop-down menu for the column you want to filter and select the criteria you want to filter by. You can also use the search field to type in specific values or use the Sort A to Z or Sort Z to A options to sort data in ascending or descending order.
2. Using Multiple Criteria in Tom and Jerry 121 Label Filters
In some cases, you may want to filter data based on multiple criteria. Tom and Jerry 121 Label Filters make it easy to do this. Once you have applied a basic filter, click on the drop-down menu again and select the “Text Filters” or “Number Filters” option. This will give you additional filter criteria options to choose from. You can then select multiple options by holding down the Ctrl key while making your selections.
3. Clearing Filters and Removing AutoFilters in Tom and Jerry 121
To clear filters and remove AutoFilters in Tom and Jerry 121, simply click on the Filter button on the Data tab again. This will remove the drop-down menus from each column heading. If you want to clear a specific filter, go to the drop-down menu for that column and select the “Clear Filter” option. You can also remove all filters by selecting the “Clear” option under the Sort & Filter button on the Home tab.
4. Creating Custom Filters in Tom and Jerry 121
In addition to the built-in filters, Tom and Jerry 121 allows users to create custom filters as well. To create a custom filter, select the column you want to filter and go to the Data tab. Click on the Advanced button in the Sort & Filter group. This will bring up the Advanced Filter dialog box where you can define your custom filter criteria. You can filter based on multiple criteria, use wildcards, and even copy the results to another location.
5. Using Slicers to Filter Data in Tom and Jerry 121
Slicers are a powerful tool in Tom and Jerry 121 that allow users to filter data visually. To create a slicer, select the column you want to filter and go to the Insert tab. Click on the Slicer button and select the column you want to create a slicer for. You can then use the slicer to filter data by selecting specific values. This is particularly useful when working with large data sets where it’s difficult to identify specific values using drop-down menus.
With Tom and Jerry 121 Label Filters, users can easily sort and analyze data in Excel by applying and customizing filters, clearing filters, and using slicers to filter data visually. These tools are invaluable for data analysis and can help users gain insights and make informed decisions when working with large data sets in Excel.
Dimensi Foto 4×6: Ukuran dan Penggunaan yang Populer di Indonesia

Budiman Sudjatmiko Ajak Pemuda Indonesia Antisipasi Krisis Pangan